The most important thing to remember (I believe) is that your should not rely only on the hard drive of your computer for preserving your pictures. Computers crash...every day. And if you do not have your photos backed up, you will loose them all. These are the steps I follow with my photos, from the moment they are taken, until the moment they are scrapped.
STEP 1:
Download onto computer.
I download my pictures to my hard drive. I create a folder for each year. In each of these "year" folders, there is a sub-folder for each month. Next, I crop and edit them to my liking.
STEP 2:
Make backup files.
I cannot stress the importance of this step enough! I send all of my pictures to an on-line processing site. I use http://www.snapfish.com/ ...but there are many on-line photo-sharing sites to choose from. I also make a second back up in the form of a CD or DVD and label it for the appropriate year and month. I know these discs will not last forever. I believe it is recommended to re-save them every few years. Once I make the back-ups, I am comfortable with deleting the photos from my memory card.
STEP 3:
Decided which photos to print.
I go through each month's pictures, and view the photos rather quickly. I make 2 lists...one for photos I want to print as 4x6 prints, and one for photos I want to print as wallets (2"x3" mini prints). If I go through the pictures quickly, I am forced to choose only the best photos to make large, and the next best to be made as "supporting" mini prints.
I do not take my time, or sit and debate back and forth whether or not to print a picture, if I have to debate...it is probably not a very good picture, and I know I should not print it. I just keep track of the BEST pictures on my two lists. I usually end up printing about 1/10 of the photos I have taken.
STEP 4:
Get the pictures printed.
I print all of my 4x6 prints at http://www.snapfish.com/ because it is inexpensive (9 cents each) and there is usually some type of coupon or sale. I look for deals on free shipping or "50 free print" specials and try to place orders when I have these types of coupons/coupon codes.
I print the mini prints in the 1-hour processing center at Target. I use the Kodak Kiosk at Target to organize and place my order. I wait until I have enough pictures to make 100 4x6 prints (400 mini prints)...then I get a cheaper cost per print. I believe it is 15 cents per print for an order of 100 prints or more. When printing the mini prints...you must go to "collages", then "mini prints", then choose the size (2 3x4", 4-2x3", or 9-1 1/2 x1"), then choose the pictures. Each image on the 4x6 sheet is a DIFFERENT picture---I cut them apart when I get home. By printing mini prints (2"x3" size) I get 400 photos for $15.00. This also allows me to scrapbook more pictures on a layout.
Once I have the prints in my possession, I feel comfortable deleting the pictures from my hard drive. If I had an external hard-drive, I would keep them saved there (as an additional form of back-up)...but I do not have an external drive.
STEP 5:
Organizing the prints.
Once I have the prints, I divide them up into the appropriate grouping for the layouts I plan on creating. for example, if I have 50 pictures of Christmas, I might make 5 different layouts...one for Christmas Eve, one for opening gifts, one for Christmas dinner, one for Christmas gifts at Grammy's house, and one for "playing with gifts". I divide my prints into piles that correspond with each layout. Next, I put each pile into it's appropriate page protector in the album.
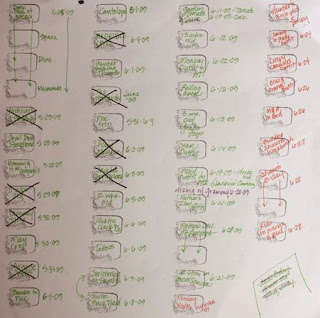
**I organize my albums chronologically, so it is easy to tell which page protector will house each completed layout. To help me keep track, I create a "Table of Contents" for each album. The "Table of Contents" is nothing more than a piece of scrap paper placed inside the front cover of each incomplete album. I list the layouts I plan on including in that album and cross each one off as it is completely scrapped. Once I finish an entire album, I throw the "Table of Contents" away.
 |
| Sample "Table of Contents" |
STEP 6:
Add the coordinating paper and embellishments.
Once I have the pictures divided into layouts, I choose matching paper and embellishments for the layout. I slip in my journaling notecard into the page protector (see my post about Journaling Tips for more information). I slide the coordinating paper behind the pictures in each page protector. If there are coordinating embellishments, or memorabilia, I will include them in the page protector as well. (See my post on Managing Memorabilia for tips on keeping track of and organizing your memorabilia.)
STEP 7:
Scrapbook that page!
Now the pictures, paper, memorabilia, journaling, and main embellishments are all in one place, ready to be scrapbooked. I do not work in chronological order. I usually just thumb through an album, pick a layout that inspires me...and work on that. Half of the work is already done for me. All I have to do is design the elements, add the title, and grab a few other embellishments (like ribbon, buttons, or flowers) and finish off the page.
This may sound somewhat time consuming, but I feel that it is saving me time in the long run. Everything is completely organized and when I have time to dedicate to scrapbooking, I am not scrambling around searching for pictures on the computer, or sifting through boxes of printed pictures. I already have the pictures and paper chosen and I am ready to get some serious scrapping done!!! I hope that some of these ideas will help you in organizing, printing, and scrapping your photos!!!


Love to see another organized scrapbooker! LOL. I have a very similar process, down to creating page "kits". I think that being organized and taking time to do the photo editing and printing and product selection ahead of time makes it so much easier to get more scrapbooking done.
ReplyDeleteI know this is an older post but I just came across it while googling "page kits". I also have all my albums in chronological order and would love to work "out of order" like you do however I use Creative Memories albums. I'm stuck with always working in order because I always have to know what's going on the next CM page because they are all front and back. In other words, it's not the kind that you can slip a page in the page protector. It's the traditional CM pages. Hope that wasn't too confusing. Any suggestions? -Cecilia
ReplyDelete