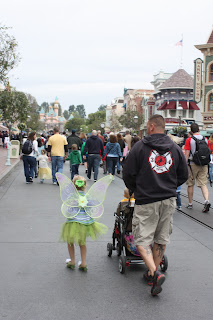
I JUST returned home from a wonderful 3 day Disneyland vacation. I was going through my 100's of pictures...and decided to share some "photography notes and tips" with you.
I'm mainly going to focus on the composition of your shots and the interactions between your subject and their surroundings. I found these to be what separated my "good" photos from my "great" photos. These examples and notes can probably be applied to all types of photography, not just Disneyland, but I think it will be fun to use the Disney pictures as my examples.
(I am not going to discuss technical information, such as camera settings, because I do not feel comfortable enough to give advise about what settings to use, as I am still learning myself.) I will say that I shot most of these pictures on the sports setting of my camera, because I didn't have time to change settings as I was walking around the park.
Note: All of the following photo examples are Straight Out Of Camera (with the exception of a small amount of cropping on some of them). They have not been altered or edited in any other way...so you can see that you can get great photos without all types of fancy editing!
Tip #1: Try getting below your subject and hold your camera at a slight angle, to get a different, more interesting composition. I tilted my camera slightly in order to get the entire building in the second shot.
 |
| Typical picture of the Peter Pan ride entrance. |
 |
| A more interesting picture of the same ride, shot from below. |
 |
| Once again, I crouched down and took the picture from below my subject, to make the background flowers look tall in Pixie Hollow. The flowers were tall, but taking the picture from below, exaggerated their height even more. |
Tip #2: Know when to take a picture at an angle...and know when to hold the camera straight. Although the tilted "angle" shots look interesting, you don't want all of your photographs to look the same. Some shots will look better at an angle, and some will look better straight on. For example, the Mad Tea Party tea cup ride looks alot more interesting when I tilted the camera. The angled shot mimics the motion and dizziness of the ride.
 |
| The Tea Cups picture taken "straight-on" looks stationary. |
 |
| The Tea Cups picture taken at an angle depict motion. |
In contrast, the facade of It's a Small World ride shot straight-on, allows for all of the details of the ride to be in the photograph. Since it is a "leisure" boat ride...the picture does not need to depict "fast" motion, but it should rather show off all of the little details about the ride.
 |
| A straight-on shot of Small World looks great! |
Tip #3: Try to move around your subject for a better vantage point. This photo of my kids watching the candy makers decorating the candy apples looked much better from the "side" rather than from behind. By moving around the subject, I was able to capture their faces watching the candy maker and the woman decorating the apples.
 |
| The original photo. |
 |
| My new viewpoint, as I moved around the subject. |
Another example of moving around the subject, for a more interesting view point...
 |
| The original photo. |
 |
| The same scene from a better point of view. |
You can even move around to the side of a sign to get a more interesting angle...
 |
| I thought the sign looked much more interesting from the side view, than head-on. |
 |
| The picture of this sign was also shot from the side. |
Tip #4: Make the background work for you...make it work like a backdrop! Simply position yourself so the background is pleasing...or wait a few extra seconds to take the picture so a "ride" is in the background (see the Dumbo ride examples below).
 |
| Not such a great background... |
 |
| The same shot with a better backdrop! |
 |
| Space Mountain was the perfect backdrop for a family photo. |
 |
| The Castle makes a wonderful backdrop at night. |
 |
| The Castle also makes a great backdrop during the day. |
Tip #5: Don't forget to use the "Rule of Thirds". If you are not familiar with the "rule of thirds"...read about it
here.
Tip #6: Do not cut your subjects off at the knees...this might sound pretty obvious, but I wanted to bring it up anyway. I am in a small handful of pictures from our trip, only photos that a stranger offered to take them. I know "beggars can't be choosers"...but in
almost every photo, we are "cut off at the knees". I realized that this must be a pretty common snapshot problem, which is why I decided to discuss it in this tutorial. Pay attention not to cut off body parts of your subjects in your photos...it looks very awkward. The exception to this is if you are trying to get a close-up "portrait"-type photo, in which case you will zoom in close to your subject's head.
 |
| We are cut off at the knees. |
 |
| Taken by a Disney photographer...we are not "cut-off"!!! |
Tip #7: Get down at the kids' eye level. Take pictures of the kids at their height. It keeps the photos looking natural, and really brings the viewer
into the moment.
 |
| You can really capture the "context" of the moment, when you get down on your subject's eye level to take their picture. |
 |
| Another example of a picture taken from the child's eye level. |
Tip #8: Take pictures of the simple moments. Getting pictures of the main attractions, like characters, rides, and posed shots are great...but I found some of my
favorite pictures are the ones where my subjects were unaware of me and my camera. I kept my camera out most of the time, so I was ready when the "perfect" photo opportunity arose.
 |
| The "unposed" pictures are sometimes the best. |
 |
| Waiting in line was a LARGE part of our day. |
 |
| The kids patiently waiting for their turns. |
 |
| Just a simple picture, without rides, characters, or "theme" park attractions. |
 |
| A moment I didn't want to miss or forget! |
 |
| I love this picture of the names on the back of their mouse ears! |
 |
| Another picture where the subjects are unaware of the photographer. |
Tip #9: Let the lights and the reflections in the park be your guide. Nighttime will lend itself to some beautiful lighting in Disneyland. I paid close attention to reflections in the water and beautiful lighting when taking scenery photos at night.
 |
| Great reflections in the water at the Nemo Submarine ride. |
 |
| I love Main Street all lit up. |
Tip #10: Take a few pictures on the rides...outdoor rides will work the best. You won't need a flash and you'll get some unique shots. The "dark" rides and indoor rides will be harder to capture in photographs, so I decided to enjoy the rides, rather than try to mess with my camera settings.
 |
| I was sitting in the same rocket as my daughter when I took this photo. |
 |
| My husband and son were in the rocket behind me, so I turned around to snap their picture during the ride. |
Tip #11: Take some off-centered photos, this will also help you get better shots of highly populated areas (like the front of the Castle). There are usually lots of people trying to get pictures directly in front of the castle and other "landmarks" in Disneyland...I decided to get some photos a bit off-centered in order to avoid the crowds.
|
| This off-centered shot gives an interesting point of view! |
 |
A closer view of the castle, without any
"tourists". |
I hope these tips and notes help you to be able to capture those special moments on your next Disney vacation. Most importantly...have a great time and ENJOY yourself!!!


Meridy,
ReplyDeleteThese are some AMAZING shots and AWESOME tips!
Looks like you had an awesome trip to Disneyland!
Thanks so much for sharing.
Fantastic tutorial. My husband and I are going to Disney World in April, so I'll have to remember your tips.
ReplyDeleteThanks for the tips. I knew I loved the pics, and now reading about the strategy that's involved to get them, I know why they were so great. I will make sure I pay attention when I try.
ReplyDeleteMeridy, great photos and wonderful photography tips! I'll have to remember those ideas for our next trip to Disneyland. The picture of your kids sleeping is absolutely precious and priceless.
ReplyDeleteLooks like you stayed at the Disneyland Hotel. How did you like it? That's our favorite place to stay, but I hear there's major construction going on right now. We plan to go back once all the construction is done and check out the new rooms too.
Glad you had a great time at Disneyland with your kids. It's great to see the parks through their eyes at this young age. Now my kids are older and it's so different from the first time they went when they were only 3 and 6. They grow up so fast! :(
A great set of tips with excellent examples - these are things we should all be aware of to take our photos out of the ordinary.
ReplyDeleteA lovely blog post which managed to show us what a great break you had and informative too. TFS
Your pictures are amazing and made me long for a Disney visit! I especially love the one of the kids sleeping! =)
ReplyDeleteThanks so much for these tips! I'll have to keep them in mind!
ReplyDeleteGreat Tips--wish I was having a trip back to Disneyland or DisneyWorld in the near future.
ReplyDeleteI love to take tilted photos too and my dh thinks I am crazy. Glad there is someone else out there like me.
Leslee in MT